Interactive quizzes are an excellent way to get to know your audience so that you can nurture that connection later on. An effective quiz will grow your email list while also driving traffic, leads, and sales your way. Luckily, they are also a ton of fun for your audience to take!
Today, I’m going to share how I set-up my quiz using Interact. I have tried several quiz building tools before and none of them were as user-friendly as this one. I hope that you can use this tutorial as a guide on how to create a quiz, grow your email list, and send custom content out to your new subscribers.
Plan it Out
Planning in advance isn’t 100% necessary since Interact has templates that you can use as a starting point. But if you’re a planner, like me, you might want to jot notes down on a Google Doc so that you can easily copy/paste and save some time during the set-up process. Start by writing down some quiz title ideas to get the ideas flowing. Keep in mind, you want to create a quiz that is informative but also fun.
Quizzes need to have that fun factor so that people actually want to take them. Take a look at Buzzfeed. When I go to their website I pretty much have to take at least one of their quizzes because they are just so fun. I mean, how I could I not find out what type of french fry I am?! In case you’re wondering, I’m Skinny Cut Fries.
After floating around a few title ideas, I decided to title my quiz: What Does You Design Style Say About your Personality? The quiz helps my audience to gain clarity on what their design style is, while, keeping things entertaining by connecting the quiz back to their personality traits.
After deciding on the quiz title, I wrote down the six results that a person could get when taking the quiz. Working backward really helped me to hone in on the result options so that I could come up with creative questions to match.
Next up, I started writing down question ideas and narrowed it down to five. I found a nice balance between questions that really focused in on the quiz takers design style and also ones that were simply more fun. Throwing in questions that are lighthearted and entertaining will keep people engaged so that they are more likely to finish the quiz.
How to Create a Quiz Using Interact
Step 1: Sign-up for an Account with Interact. You can test the platform for free and then upgrade to a premium plan after you’ve made sure it’s a good fit for you! I have a feeling you’ll love it.
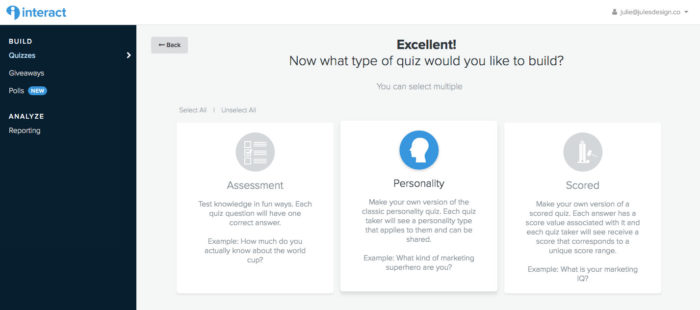
Step 2: Use one of Interact’s many pre-made templates to save time or create a quiz from scratch. I chose to create a quiz from scratch so that I could test out all of the features for you.

Just so you know, they have a TON of templates available. Take a look at some of the categories:
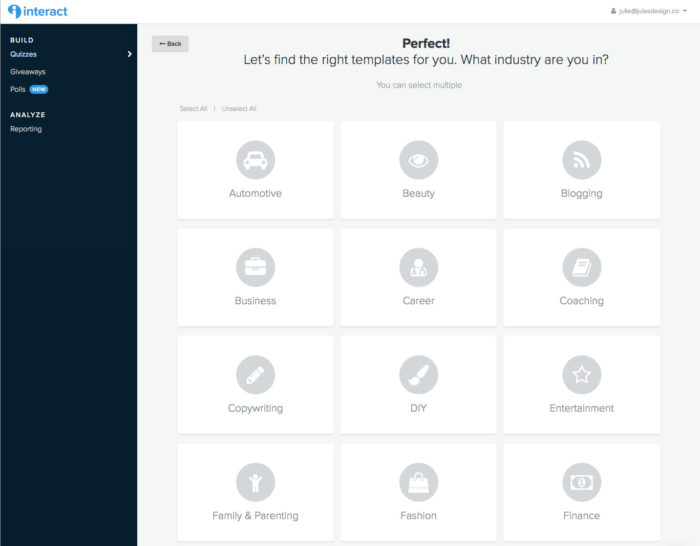
Step 3: Select the type of quiz that you would like to create. I chose a personality quiz type, mainly because I think those quizzes are so entertaining! I don’t know about you, but I love getting results that are customized, just for me. Also, personality quizzes bring me back to the days when I was taking fun quizzes in magazines like Girls Life and Seventeen.
Step 4: Next up, customize your quiz with your own brand colors and fonts. Add a catchy quiz title, cover photo, description, and button text to your quizzes landing page. Remember, you want to entice people to take the quiz so explain the benefits and set expectations. A great way to increase engagement is by offering up a free resource that is customized to a person’s results.
Tip: Interact connects directly with Pixabay, making it really easy to source free stock images. Or, you can choose to use your own photos, like I did.
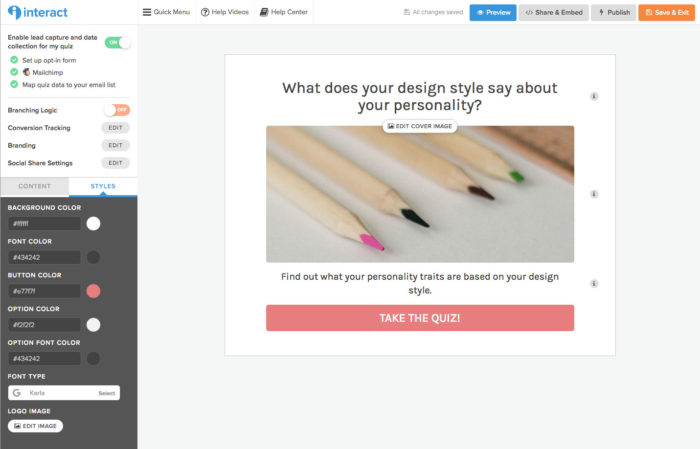
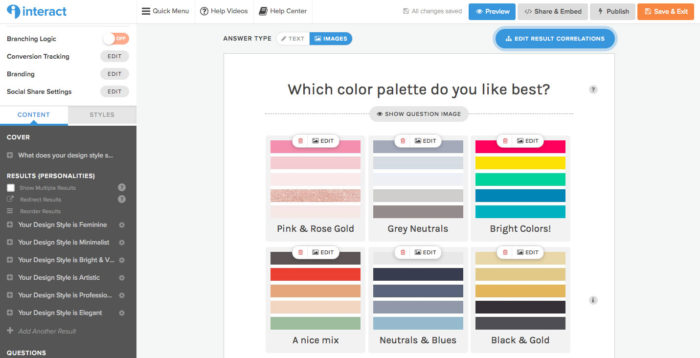
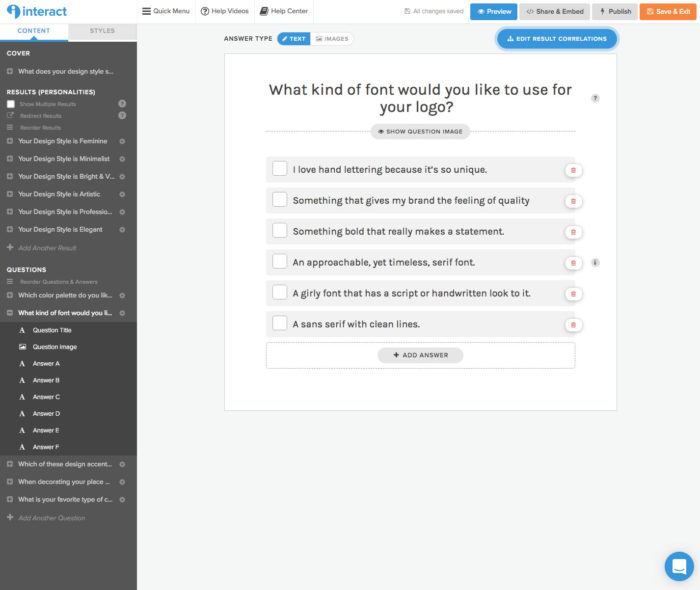
Step 5: Remember how you planned out the strategy behind your quiz and mapped out all of the questions beforehand? Pull that document up because it’s going to come in handy. It’s time to build your quiz! Now, you can simply copy and paste your quiz questions and answers into Interact. You can also choose to add images or keep things text only (see screenshots below).
Tip: To keep engagement up during the quiz – try to keep things short and sweet. 3-7 questions are perfect!
Example of image question types:
Example of text-only question types:
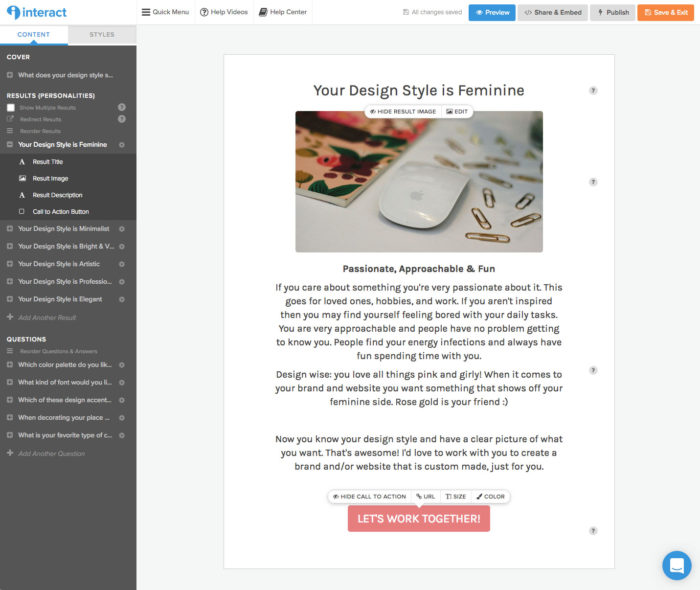
Step 6: Now it’s time to create the results of your personality quiz. This page is the one that the quiz taker is going to be really excited about because it will have their custom results on it. I’m sure you’ve taken a quiz or two around the interwebs – I know I have! The quiz results are always the best part and are so much fun to read. So, really put some energy into making these result pages engaging and enjoyable for the reader. You can add a title, image, and a nice description of each result.
Interact is unique, in that, they have a call to action button on the results page. You can use this button to link to anything you like! My suggestion is to use it to link to a freebie PDF, services page, landing page, contact page or even a social media site that you want to grow.
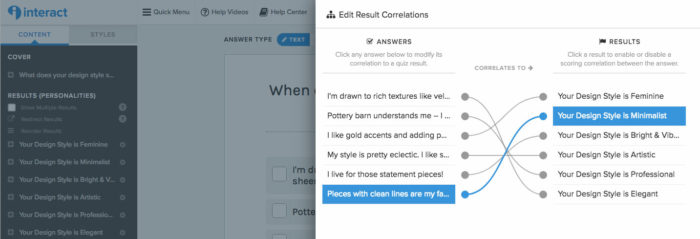
Step 7: Next up, you can connect your questions to the results that they correspond too. Click the “Edit Result Correlations” button in the top right-hand corner. Then simply match up the answers on the left-hand side to the results on the right. So easy and honestly so very fun!
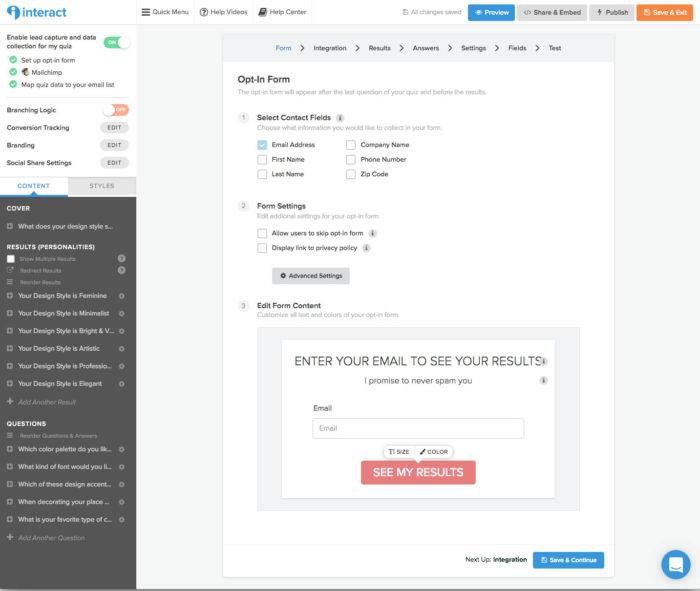
Step 8: You’re almost done! Now you just need to set-up your opt-in form and connect your account to your email provider. Interact has a bunch of options available to design your opt-in form and add any additional form fields that you want to capture. I selected the basics here. Next up, integrate with your email provider – I use MailChimp.
Email Opt-In Form Settings
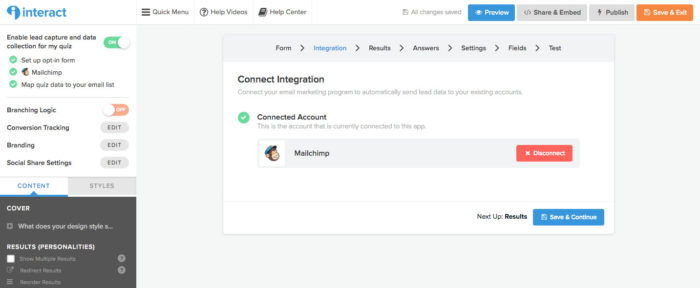
Integrate with your Email Account
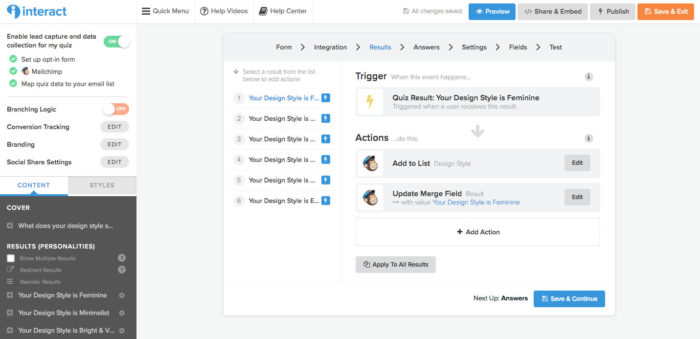
Step 9: After integrating Interact with your email provider, you can set-up a series of triggers that occur after a person takes your quiz. In the screenshot below, you’ll see how I set up my quiz triggers.
First, the quiz taker is added to a list I made in MailChimp called Design Style. Then, a merge field is created inside that list so that I know what result the quiz taker got. That way, I can segment my list and send custom emails based on their results. Now that you’ve set-up your triggers, you can create emails and automate them using your email service provider.
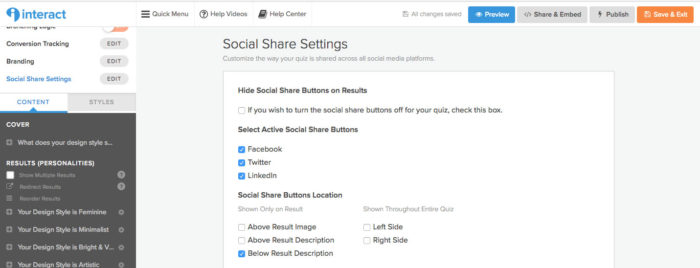
Step 10: The goal of these interactive quizzes is to grow your email list like crazy. And, this won’t happen if it’s not visible. Enable the social share buttons so that your quiz has more opportunity to go viral. This makes it really easy for people to share it with others and even share their own results – driving more traffic over to the quiz. You can also enable Google Analytics tracking and the Facebook Pixel so you can keep track of how your quiz is doing.
Conversion Tracking Options
![]()
Social Share Settings
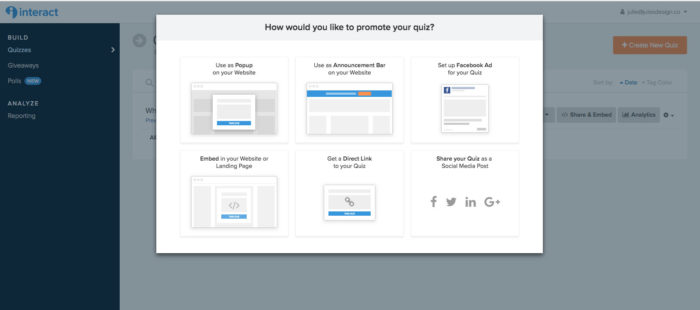
Step 11: You did it – Congratulations! It’s time to hit publish and promote your quiz. The first step is to place the quiz on your website. I chose the “embed on your website or landing page” option and then pasted that code into my WordPress editor. If a pop-up or announcement bar is more of your thing, then you can add one of those instead.
Interact also has a few features available to easily promote your quiz, including the ability to share the quiz on social media. You can also set-up a Facebook ad to get even more eyes on your content and new leads to your email list. This is such a handy tool because you have to promote the quiz for people to know it exists.
Final Thoughts
As a website designer, I have used a few different WordPress plugins to create quizzes. Although they usually got the job done I was never really impressed with any of them. In general, they weren’t very user-friendly and I would have to spend hours figuring out how to set up the quiz to work correctly.
Although some of the plugins offered color customizations, others did not. In some cases, I would need to use CSS to style the quiz to match my client’s branding. This wasn’t a huge deal for me since I build websites, but I couldn’t imagine my clients doing this themselves.
Interact, on the other hand, is so easy to use! It’s a drag-and-drop builder that requires no coding knowledge what-so-ever. So any business owner (even the least tech-savvy among us) can set-up a quiz and post it on their website with ease. Plus, it looks amazing!
Easy integration with your mailing list is key since the goal of an interactive quiz is to grow your email list. I love that Interact automates this process by segmenting based on a person’s result. This makes it really easy to nurture your list by creating and sending out content that is custom for them!
So far, I’ve only created the one personality quiz. But, I can see myself using this for so many other things. It’s a great way to grow your email list while also getting to know your audience. It’s definitely the tool that I’ll be recommending to my clients for quiz creation. Ready to create your own quiz? If you’re interested, you can sign-up for an Interact account using my affiliate link – right here.
Want to see a real-life quiz in action? You can take my quiz below:
You only get one homepage. Let’s make it work harder. Get a free expert review of your homepage, so it actually attracts your dream clients!
Free Homepage Health Check
Copyright 2022 - All Rights Reserved | Website made by Jules Design (of course!)
Terms & Conditions
Privacy Policy
We are a Richmond Virginia based website design and brand identity design studio for dietitians, nutritionists, health coaches, fitness professionals and wellness entrepreneurs. We love working with brands with compassion in the health space.
